It’s been a while since I’ve posted an update on the progress of the tools. I’m pretty happy with where things are right now where they’re headed. I figured I’d make a post comparing the differences of creating a new component in the beta version of the tools to the new version of the tools.
In the beta version, a fair amount of code needed to be written and a fairly complex maya file had to be created before you could have a component that could generate some joints. This was frankly due to bad design and a lack of forethought and planning.
The highlighted methods were ones that needed to be implemented in this case, for the leg to work and generate joints.
The joint mover file was also complex and had some assumptions about hierarchy and naming. All bad.
There’s a lot to address here. For instance, the class for a component should be much simplified and should not need to be building UI widgets and such. Lots of the bespoke functionality was because of a lack of a unified system, so each component might have its own way of pinning a component, or setting up aim mode, or whatever.
Here’s a class diagram of the refactored code.
There’s a lot to look at, but the important bit is BipedLeg and how little is needed to get that component creating some joints. To create a component, you simply need to define the unique properties of that component (ex: number of thigh twists) by adding them as attributes to the metanode and then implementing their property getters and setters. You also need to define/create a joint mover file, which is now incredibly easy.
For the new joint mover file, you start by creating the joints you want your component to have in its max configuration (there are exceptions to this like the spine and chain which you actually create the min configuration).
Create the joints you want your component to create, and give them a name (which the user can then overwrite if they wish).
Once you’ve created your joints and ensured your joint orients are nice and tidy, there is a tool to mark the joints up with attributes. These attributes will build the joint mover controls, determine how aim mode is setup, etc. Once you’ve set the attributes, save the file, set the class attribute for the path, and you’re good to go!
Mark up joints with attributes to determine the control shape that will be applied, if the joint aims at another joint, the aim details and so on.
With these changes, creating new components in the refactored code is incredibly easy and quick. I’m sure there are things that could still be better, but it’s definitely a marked improvement from where things were. So far, there are 11 components in the ARTv2 refactor. Some of the previous components like arm, have been broken down into arm and finger.
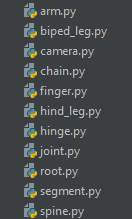
The components in the ARTv2 refactor build.
Creating a component instance brings in the joint mover file, then builds a joint mover on top of the joints according to the markup data.
In the next post, I’ll go into the new user interfaces and how the refactor helps automate widget creation for components.