ARTv2

Refactoring Part 3: Proxy Model Maker by Jeremy Ernst

In the last post, you saw a glimpse of what one of the refactored components looks like, but you may have noticed that the proxy geo that comes with the components in the ARTv2 beta version was missing. One of the things I wanted to do when doing this refactor was simplify and separate responsibilities. The joint mover was doing too much. It was responsible not only for placing joints, but for defining the proxy geometry. This made the class huge and also made the joint mover carry around lots of baggage that was really only needed at the very beginning of the process.

ARTv2_leg_component.PNG

Also, some people may not even want or need the proxy geometry. They may just want to simply place a component’s joints and not have to worry about or fuss with that step. So, I decided to remove it from the component and separate it into its own tool. This way, people that want to use proxy geometry still can, but it is not included with the components.

At work, we use proxy geo extensively. It lets us get characters in game with only a rough concept sketch and validate and iterate on proportions and height quickly. This also provides a template for the modelers to build the final asset from. We wanted to add more features to the proxy geo to be able to validate form, which the current ARTv2 beta setup was too clunky to do. It was at this time, that I decided to separate out proxy geo from components and add more features to the proxy geo in order to get better results that would allow validation and iteration on proportions, form, and scale.

Basic shaping in the Proxy Model Maker tool

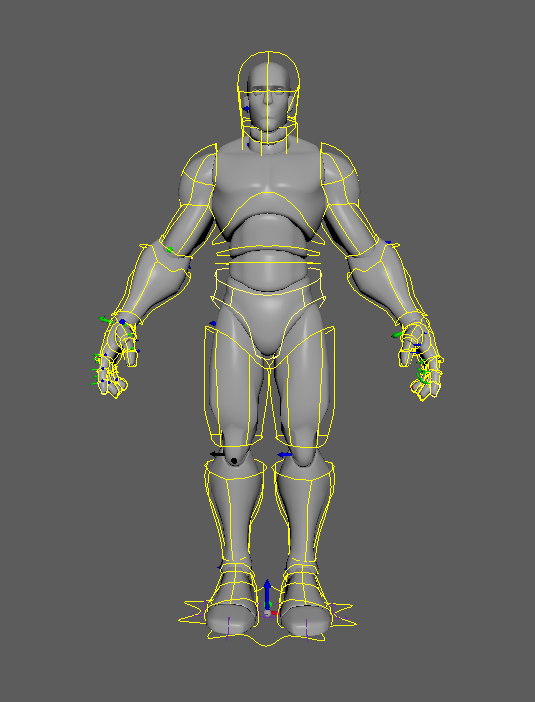
The stand-alone tool (meaning it can be used outside of ARTv2 altogether), is setup in a similar fashion to the ARTv2 refactor, meaning it is component-based. For every ARTv2 component, there will likely be a matching proxy model maker component. As you can see in the above video, proxy geo components are no longer segmented. There is a simple “rig” that allows for some basic shaping.

In the component settings, you will see that there are sliders for the physique. These allow some basic detailing to rough in the form of the body.

Furthermore, there are shaper controls that can be used to further shape a component. These shaper controls support local mirroring (mirroring within the component).

Some components, like arms and legs, can be mirrored. Settings from any component can be copy/pasted to similar components, and transforms can be mirrored across components like arms and legs.

Settings, Transforms, and Shaper values can be copy/pasted and mirrored.

Settings, Transforms, and Shaper values can be copy/pasted and mirrored.

Some components can be mirrored.

Some components can be mirrored.

So, in short, that’s what I’ve been working on (albeit, not a ton as other work-related tasks have popped up!). To be honest, while I know it’s a marked improvement over what was there initially, I still think it might be a bit limited compared to something like CG Monastery’s MRS, in terms of this catering more to a semi-realistic style. I also really like their lofted setup. For my shapers, I’m using wire deformers, which I think works well enough.

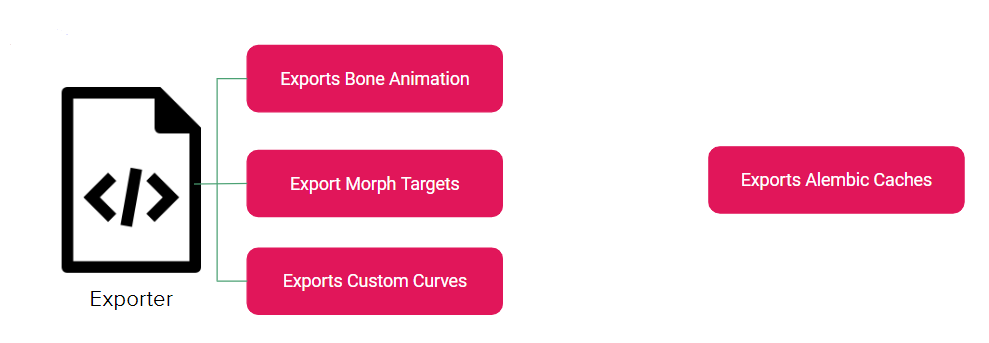
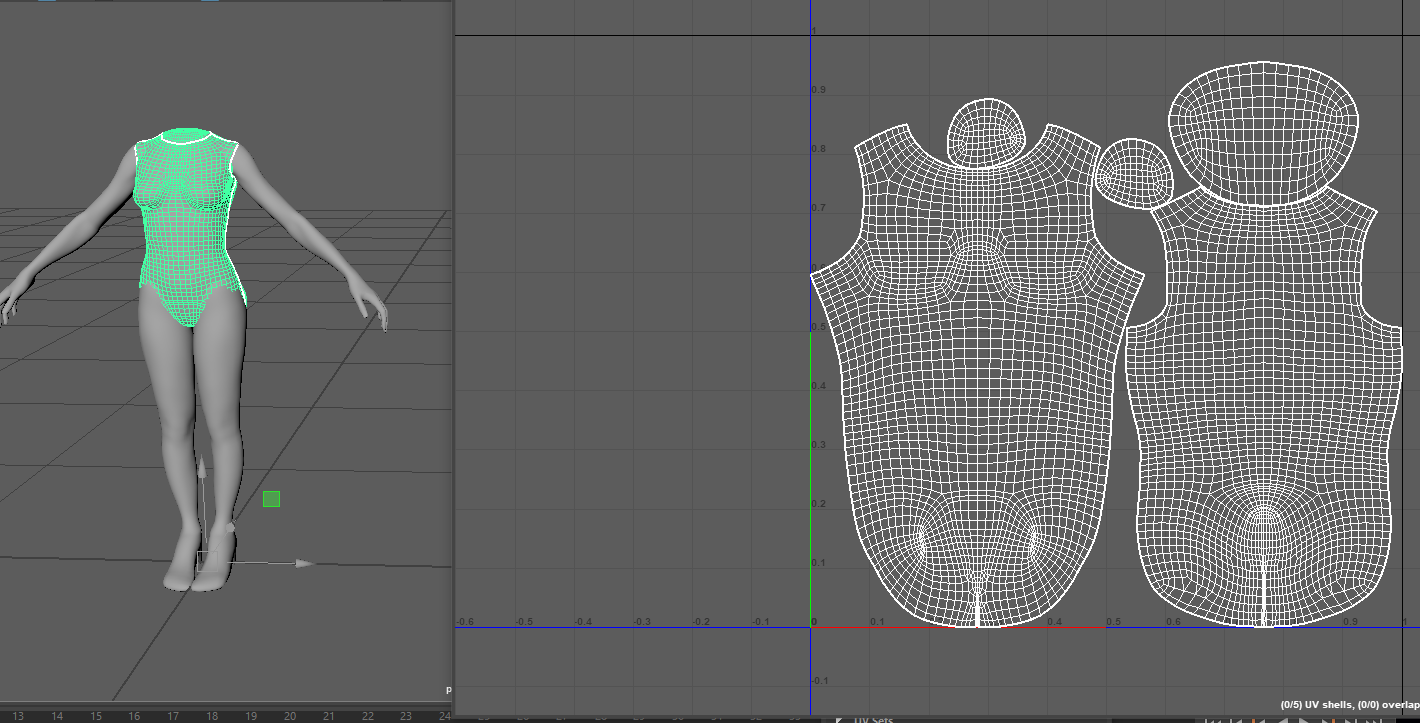
As you can see in the UI, the output of this tool will be a single mesh without all these deformers that can then be rigged and skinned. Now, if you use ARTv2, the plan is that this will be automated (it will know where joint placement should go based on the mesh and should know how to skin it based on your ARTv2 component settings). This work hasn’t been completed yet, and I still need to do the head component, prop components (single joints), chain components (tails, tentacles, etc), and the export mesh feature. If you don’t use ARTv2, then the plan is to have the hooks there so you can automate that with your own stuff. Oh, also, all the meshes are already unwrapped, so you can paint a quick texture on there for color-blocking your proxy. Part of the plan for the export mesh function is to take the UVs and combine them onto a single set.

UVs.PNG

Lastly, here’s a demo of what I have so far:

If anyone is interested, I can go over the code stuff in a follow-up post. Let me know what you think, as I think this is a good direction, but honestly, I’m just winging it.

Refactoring Part 2: Basics by Jeremy Ernst

I didn’t mean for two months to pass between these posts, but c’est la vie. The last post went over some high level concepts of refactoring. In this post, I’ll start to show how the concepts are being applied to ARTv2. Let’s start with the base component class. This is an abstract base class that all components inherit from.

Abstract classes may not be instantiated, and require subclasses to provide implementations for the abstract methods

The original (currently available) version of ARTv2, the base class was huge. It did way too much and was too cumbersome to sort through and debug issues. One of the goals for the refactor was to do a better job simplifying classes and their responsibilities. Below is the current state of the base class.

new_base_class.PNG

The base class contains the bare minimum amount of common functions and a few necessary properties. Properties are being used to handle lots of functionality when modifying aspects of a component. In the previous post, I mentioned how many ways I had implemented setting a parent of a module. This is now done via a property on the abstract base class.

For those that don’t know about properties, they’re essentially class attributes that contain functionality. There are plenty of good articles out there explaining them, like this one. Take for example, the property parent. If I want to know a component’s parent bone, I can call inst.parent, which will use the getter function of the property decorator to return the parent bone. This functionality of how that info is returned in defined in the property, like this:

This is just returning the attribute value on the metanode (more on that later). If I want to set or change the parent of this component, I can do inst.parent = “new_bone”. This will call on the setter of the property, which contains a little more functionality.

Compared to how I was doing this before, this is a significantly cleaner way to handle getting and setting the parent bone of a component. You may notice the setter calls on some extra functionality. This line in particular is of interest:

In order to separate out responsibilities, I’ve been using composition.

Composition means that an object knows another object, and explicitly delegates some tasks to it.

At the beginning of the base component class, the following code is executed:

The last two lines are an example of composition. An instance of a class is assigned to a class attribute, which then delegates functionality to that class. So rather than include all the joint mover functionality in the base class, it gets separated out into its own class that only handles joint mover functions. Then the base class can call upon that JointMover class to execute functions related to joint movers. (In this case, adding the joint mover for this component to the scene). An important thing to note here, is that the ART_Component knows about JointMover, but JointMover does not need to know anything about ART_Component. It is given all the information it needs on instantiation (which is the joint mover maya file and the metanode that contains all the metadata it needs).

To finish this post, I’ll talk about the metadata/metanodes. While the current version of the tools utilizes these, it does not nearly utilize them enough. Probably because I didn’t fully grasp how to properly utilize them. First, they (in my refactored implementation) are a huge part of the component’s class. Any information the class returns when asked is going to be pulled off the metanode. Anytime data is changed, it is on the metanode. The properties mentioned earlier, are essentially getting and setting metanode data as well as doing the extra needed functionality.

For example, when setting a parent for a component, one of the first things it does if the parent is valid, is set that data on the metanode.

When returning the parent, it returns the data from the metanode. Why does this matter? Well, the biggest reason is that it makes it incredibly easy to make an instance of a component to get access to its functionality when you have a way of supplying all of the information an instance of the class would need.

In the ARTv2 beta, I actually do not have a great way of getting instances of classes to access functionality. If I want to call on a component’s buildRig method, I do all this extra work to build up an instance of that class in order to do so. Now, a component can be instantiated with a metanode, which it will then use to populate its properties.

Furthermore, everything can be done via a command line now. Embarrassingly, this was not the case in ARTv2 beta. So much of the functionality was only accessible through the user interface. Here is an example of some of these concepts in action:

Creating a root and leg, and setting some properties on the leg.

Creating a root and leg, and setting some properties on the leg.

Accessing an instance of a component by passing in its metanode.

Accessing an instance of a component by passing in its metanode.

One thing you might notice is that proxy geometry is gone. More on that next time!

Refactoring Part 1: Concepts by Jeremy Ernst

I wanted to write some posts about refactoring ARTv2 as I go through it. Personally, I’ve learned a lot developing these tools over the last few years. When I started writing these tools, I had a very different outlook on writing code. This had a lot to do with the incredibly fast-paced production environment I was in. I definitely looked at code as a means to an end, and if it “worked”, it was done.

Depending on the tool or the scope of the tool, this might be fine. When I start thinking about our industry though, where most of us are working on games that are considered services, a successful game (League of Legends, Fortnite, World of Warcraft, etc) could span 10+ years. And when you start thinking about the tools and pipeline you are using now, and being stuck with it in 10+ years because your project is still successful, you’ll probably wish you would have put more effort and thought into your code.

The neat thing about where ARTv2 is now, is that it is much easier to look at the big picture and see where things can be fixed and cleaned up. When I first started writing it, I didn’t really have a big picture in mind. I’d develop a feature, then think of the next feature, and develop it. This led to lots of giant files with lots of duplication. So, now I’ll talk about what refactoring is for anyone that doesn’t know, and why it’s important.

Code refactoring is the process of restructuring existing computer code—changing the factoring—without changing its external behavior.

When you tell your producers or lead that, it can be hard to sell them on the idea that this is a valuable endeavor. So, I actually made a slide deck going over the benefits of refactoring and giving some examples. I’ll start with a completely true example that came from ARTv2.

I was working on a character and a bug presented itself where joint and chain modules weren’t being parented correctly. I tracked it down and implemented a fix. A couple days later, I change the parent on one of those modules to a different joint, and the bug pops up again. I track it down and find that I had duplicated that parenting code into the change parent method. So I fix it again. Some time later, I go to create a mirror of a module, and sure enough, the bug pops up again. It also popped up when loading a template. There were four separate places where the parenting code was implemented. And this comes from the way I thought about code before.

By implementing things on a feature-to-feature approach, each feature was built as a complete tool. Each feature would have code duplicated throughout with little regard to re-use or sharing common functions. Did the code work? Sure. But as the above example points out, it makes tracking down and fixing bugs a massive pain (and it’s just sloppy). When I ran into that same bug over and over, I realized that maybe I should do a pass and clean things up.

However, as I looked into it more, I realized I should just take this opportunity to really think things out and to also write unit tests as I went. If you don’t know what a unit test is, it’s basically code you write that tests code you’ve written :) A quick example would be if you had a function that took in an integer and added two to it. Your test would then call on that function with different inputs and maybe different types of inputs, and assert that your output assumptions are correct.

import unittest

def example_func(value):
    return value + 2

class MyTest(unittest.TestCase):

        def test_simple(self):
          self.assertEquals(example_func(2), 4)
          self.assertEquals(example_func(0), 2)
          self.assertEquals(example_func(-2), 0)

          # here, we know this should fail, since we haven't added anything to deal with strings. 
          with self.assertRaises(TypeError):
              self.assertEquals(example_func("one"), 2)

        def runTest(self):
            self.test_simple()

test = MyTest()
test.runTest()

This is a super simple example, but hopefully it illustrates what a unit test does. If you know that each of your methods has a test, it becomes very easy to isolate problems and ensure problems don’t arise in the future.

Moving on, these are the main reasons for refactoring ARTv2:

  • Remove Duplication

  • Simplify Design

  • Add Automated Testing

  • Improve Extensibility

  • Separate Form and Function (UI from functionality)

I’ve talked about the first and third, so let me quickly explain the second using the duplication example. That implementation was something akin to this:

duplication_example.jpg

A better implementation would be something like below, where each of those tools simply calls upon the module’s set_parent() method. This approach not only removes duplication, but simplifies the design. Any user who wants to set the parent on a module can probably guess correctly that such a method exists on the module class.

simplify_example.jpg

It all seems so very obvious now, but when I first started out writing this, my mind just didn’t think about the design of code at all. Being self-taught likely means I skipped over a ton of the basics that most programmers just know.

Lastly, extensibility. (Is that a word? Spellchecker seems to think not) Basically, this is designing your code in such a way that if the parameters or requirements change, code modifications are minimal. Here’s an example of that:

Here, we have an exporter that has a monolithic method for exporting bone animation, morph targets, and custom curves. Later, we now need to add the ability to export alembic caches. This export method is already a beast to dig through. It’s not at …

Here, we have an exporter that has a monolithic method for exporting bone animation, morph targets, and custom curves. Later, we now need to add the ability to export alembic caches. This export method is already a beast to dig through. It’s not at all easy to modify.

Here, we’ve refactored it so the main exporter just finds export object subclasses and runs their export function. Now, anyone can add a new subclass of the export object and implement it’s do_export method and not have to worry about the rest. (Thi…

Here, we’ve refactored it so the main exporter just finds export object subclasses and runs their export function. Now, anyone can add a new subclass of the export object and implement it’s do_export method and not have to worry about the rest. (This was just a mock-up example to illustrate a point!)

In the next post, I’ll go over some of the fundamental changes that have been made so far to ARTv2 with these things in mind. (also, apologies if any of this was dead obvious to any of you. Perhaps I am the last to catch on to all this good code design stuff)

ARTv2 Beta Available Now by Jeremy Ernst

I really didn’t want to release ARTv2 until I was entirely happy with it, but I’ve had a ton of people requesting it, so I finally caved. This is not the final version! I am in the midst of doing a huge refactor to clean things up a ton. Check out the roadmap post here.

Head over to the ARTv2 page to read the rest of the details.

ARTv2 Space Switcher Updates by Jeremy Ernst

Over the holiday break, I worked on some updates to the space switcher, which was originally written back in February of 2018. This was to address some feedback from animation at work and to fix issues with cycles happening even if spaces were inactive (for instance, if you had a space on the hand for a weapon, and a space on the weapon for the hand, this would cycle, even if only one of those spaces were active). The updates implemented changes to address these issues and I ended up re-designing the system from scratch, rewriting most of the code, and redesigning the interfaces to be much simpler.

I forgot to point it out in the video, but when creating global spaces, you can save and load those out as templates. So if you just want to create a template for your project for your space switch setup, you can do that. It’s also scriptable, so when building the rig, you can also just add a call to that class, passing in the template file, and it will build the spaces as part of the rig build.

Check it out and let me know what you think :) (Hopefully, the animators at work like the updates!)

(Oh, and since it keeps coming up, there are two major things left to do before releasing. The first, is to document the hell out of everything. That’s in-progress. The second, is to make sure the updater tool is still working, since it’s been about two years since I wrote it :/ Once both those are done, it’s going live!)

New Feature: Pose Library by Jeremy Ernst

This feature took some time. Between various tasks popping up in between trying to work on it, and having to re-learn a bunch of math stuff, it took way longer than I would have liked, but it’s nearly complete. With this feature now complete, I’ve got some bug fixes I want to hit, some documentation I want to write (well, not want to, but need to) and then I want to get all of this stuff out there.

Take a look at the pose library tools and let me know what you think!


More fun in PySide! by Jeremy Ernst

This week's adventure involves doing something that you would think would be super simple, but instead involves image manipulation! I wanted to have the icons of the tabs of my animation control picker darken if they were not selected. With the image below, it isn't as clear as it could be as to which character tab is currently active. I added some height margins, but it would sure be a whole lot clearer if the images weren't the same value!

animPicker.png

It became evident that I was going to need to take some of the knowledge from last week, and apply that to this problem. So let's drive into that.

First, I hooked up the tabWidget (currentChanged) to a new function that would do the image manipulation and set the icon. In this new function, the first thing I do is get the total number of character tabs, as well as get the currently selected tab.

As I loop through the tabs, if the tab I am on in the loop is the currently selected tab, I access a property on the tabWidget I created that will give me the QIcon in memory, so that I can set the tab icon back to the original image on disk.

If the tab is not the currently selected tab, I get the QIcon of the tab, then get the pixmap of the QIcon, and then convert that to a QImage.

This is the fun part! Now, I loop through the x and y positions of the image, sampling the rgb value of the pixel at those positions, darken that value using QColor's darker function, and then set the pixel on our temp QImage at the same x,y location to that new darker color. This continues until all pixels are read, darkened, and then set, on the new QImage.

Now all that is left to do, is to convert this QImage to a QPixmap, and set the tab icon to that new, darkened image (which only exists in memory, not on disk).

The end result now gives me exactly what I was looking for!

Much more clear!

Much more clear!

Here's the full function as well:

Hope this helps anyone else looking to do something similar! 


Customizing QToolTip by Jeremy Ernst

This is not a post about style-sheets. I wish it were that easy to add a background image to a QToolTip, but it's not.

I wanted to look into adding background images to tool-tips. The first thing I found was that you can use html as your tool-tip text to display an image in the tool-tip. But, I didn't want to just display and image. I wanted to display an image with text on top of it.

Here's how you can simply display an image as your tool-tip using HTML:

With this method, I would need to author tons of images just for tool-tips, which is crazy. I started digging into generating my own image using QPainter. While looking at the documentation, I found that QPainter had all sorts of handy functions to draw things, and this could all then be saved to a QPixMap. This worked really well! I supply an image to paint as the background, then draw text on top, then save that out as an image. I was pretty stoked when I got to this point. Here's the code for that:

My intention was to have 1 tool-tip image. It gets overwritten anytime a tool-tip is requested with the new image. However, when I would have widgets call on this method to generate their tool-tip image, it would only happen when that interface was instantiated, meaning the singular tool-tip would get stomped, and all widgets would end up with the same tool-tip.

The next idea was to give this method a unique filename to save out. But then I could end up with hundreds of tool-tip images, which isn't really much better than authoring my own. I really wanted the tool-tip image to be generated when a tool-tip was requested by a widget. To do this, I need to intercept the ToolTip QEvent. Okay, fine. How can I do this?

I created another function that is my own tool-tip event handler.

Now for the last steps. When creating a widget, I reassign the widget's event method to this method instead.

The tooltip_text property holds the text I want displayed on top of the image. The tooltip_size property, which is optional, determines which background image gets used. The first line, which is where this button's event method is reassigned, passes in itself as an argument so that I can query the above properties and set the tool-tip on that widget. This means there is only ever 1 tool-tip image, and it gets generated whenever a ToolTip event is intercepted (if that widget has reassigned its event method).

Below is what the end result looks like. Keep in mind it's the same image file being displayed on all of the buttons.

tooltips.gif

This was one of those things where I had the idea, and went down the rabbit hole until I figured it out. Is it super useful? Not really. But it adds an extra 5% of polish to my tool-tips I suppose!

ARTv2: New nested directory and existing directory support! by Jeremy Ernst

I've been wanting to do this for a while now and finally got around to it. In ARTv1, the tools could publish to a project directory, and that was it. In the initial implementation in ARTv2, you could publish to a project directory and one sub-directory of your creation. Now, you can create limitless sub directories under your project!

Furthermore, you can use an existing directory structure, like your source control directory, as the tool's project path. Then you can publish into that existing directory structure so you can keep your existing source assets and rigs all in the same place!

Also shown in the videos is the new UI styling. It's still a work in progress, but most of the rigging tools are re-styled.

Left: Old Style

Left: Old Style

Hover states

Hover states

As always, thanks to Epic and Riot for allowing me to share these tools with you all. Go support their games!

ARTv2: New Controls by Jeremy Ernst

I recently got some feedback from an animator that they found the new animation controls to be too busy. I can totally see that. I wanted to have controls that had some depth to them, but it really does add a bunch of clutter. The controls are taken from the joint mover curves below:

before_ctrls.PNG

So, if you had a character fully in FK, that's basically what you'd see (though the controls would be colored differently).

After working with him to find a scheme he liked, I've added a new feature that adds support for adding custom control shapes to the joint movers. These curve shapes hook up to the existing joint movers, and when the rig gets built, if connections exist, it will use those connections as the template for building rig controls. If not, it defaults to the joint mover curves.

So now, I can add a control shape to the joint mover file and get it where I want it. Then I parent it under the corresponding joint mover and select the joint mover and the new control and run the following to hook up the connection.

import maya.cmds as cmds

cmds.addAttr(cmds.ls(sl=True)[0], ln="fk_rig_control", at="message")
cmds.connectAttr(cmds.ls(sl=True)[1] + ".message", cmds.ls(sl=True)[0] + ".fk_rig_control")

cmds.addAttr(cmds.ls(sl=True)[0], ln="ik_rig_control", at="message")
cmds.connectAttr(cmds.ls(sl=True)[1] + ".message", cmds.ls(sl=True)[0] + ".ik_rig_control")

Which in turn, give me these attributes on the joint mover:

rig_controls.PNG

The end result looks like this now once the rig is built:

IK controls

IK controls

FK controls

FK controls

Definitely a cleaner look. This allows the controls to always be present as soon as you start adding modules, which means you can edit those control shapes and those edits will persist. No more making post-scripts to scale controls or manually doing it in the rig after build!

There is also a new tool in the rig creator interface for accessing these control shapes for editing:

edit_rig_ctrls.gif